SSRS 2016 supporting Power BI Desktop reports is now in
preview on Azure. But for many of us, we'd rather be able to review this in our
own virtual environment, and more specifically - VirtualBox. We'll now you
can.
Our starting point was a blog posting my Microsoft employee
Christopher Finlan outlining the steps needed to setup this preview in a
Hyper-V environment. A great start, but what we wanted was the ability to run
it Virtual Box. Fortunately for us, running the downloaded VHD in VirtualBox is
much easier than Hyper-V.
Also see: Upload Power BI Desktop .pbix to SSRS 2016
Also see: Upload Power BI Desktop .pbix to SSRS 2016
Overview of Steps
- In Azure, create a new SSRS-PowerBI preview virtual machine
- Download the Azure VHD
- Create a new VirtualBox VM - without storage/virtual harddisk
- Update the VM settings and add the downloaded VHD
- Start the VM, log in, and add VirtualBox Guest Additions
- Delete your Azure virtual image and both storage items
- or pay about $5.00 a day in storage costs.
Detailed Steps
Create a new Azure SSRS 2016 with Power BI Desktop support.
Rather than repeat what has been done - you can just follow the steps outlined on MSDN. Keep a record of both the admin login name and the password.
Download the VHD for you newly created Azure image
Again, just follow the steps outlined by Christopher
Finlan on his posting. We plan to use VirtualBox, so when following Finlan's steps, you only need to download the VHD. After that, you can stop. Using VirtualBox, these is no need to do the other steps he has outlined to get it to work with Hyper-V. We used Microsoft's Azure Storage Explorer to great success.
Create a new VirtualBox machine
And then update the configuration settings for your new VM
Start with these settings
- General - use defaults
- System
- Motherboard:
- memory: 8+ GB,
- floppy: disable
- others: go with defaults
- Processor: 4+
- All others: use defaults
- Display use defaults
- Storage
- move your downloaded VHD to your newly created VM folder. Not required, but it helps to keep the folders well organized
- attach VBoxGuestAdditons.iso to the CD/DVD
- Audio - defaults (disabled)
- Network - we use the bridged Adapter
- Serial Ports - defaults (disabled)
- USB - use defaults (disabled)
- Shared folders - we usually hold off on this until we install Guest Additions
- User Interface - defaults
Start up the VM in VirtualBox
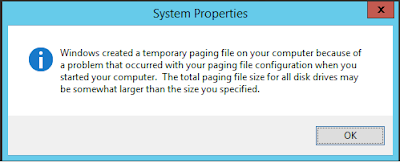
On first start-up, it takes several minutes. Login with your pre-configured admin login and password. After login, we were greeted with a Swap-file warning. Review the paging file settings, and adjust as necessary.
Install VirtualBox Guest Additions
While not necessary, adding Guest Additions allows us to use shared folders. A very nice plus.
Delete your Azure VM and both storage files
When created, the Azure VM sets up two storage files. The smaller +/- 133 GB VHD file you download. The other one is over 1 Terabyte. Naturally, you do not need to delete them, but we found that but left on Azure - even if it is turned off, it will run you about $5.00 a day in
storage costs.


2 comments:
It seems there are indefinite uses of Power BI apart from just creating dashboards and reports for end users and hence this product proves itself worthy to use.
Power BI Read Soap
Hi.
Grat article with excellent content.
Thank you for sharing this awesome blog,keep updating...
Power BI Training
Post a Comment