Monday, December 21, 2015

MDS - Create and Reuse a Master Entity Across Models

Master Data Services 2016 now supports the ability to create a Master Entity, and use it in all your models.  It's called Entity Sync.

Master Data Services supports the concept of Models, and the documentation encourages the use of multiple models for your different data groups, such as products, customers, etc. All well and good, except that many of those models use the same entity. A key tenant for a master data repository should include the ease with which data can be sourced from a master location. Yet, within the previous versions of MDS, reusing a core entity across multiple models was not supported natively.  You had to create custom SSIS packages, or some other band-aid approach.  

Entity Sync


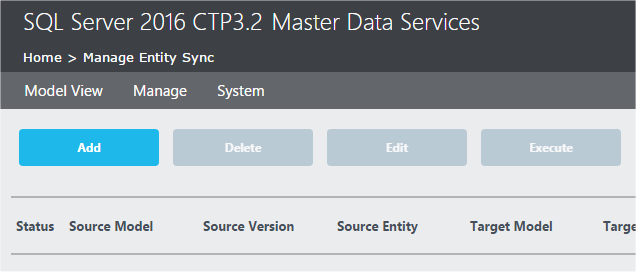
As part of the System Administration, you now have a new item under the Manage menu - Entity Sync.


Add/Edit


Using the Add/Edit button, you are presented with a form on the right that allows you to select the source Model, Version and Entity, along with the destination Target Model and Version. Plus the ability to push it to either an existing entity or a new one, the name for the new entity and the frequency the data is synced.


Is Sync Target

Once you have setup a entity to be sourced from a master entity, it is flagged as "Is Sync Target" on the main entities page for the target Model. Under the property listed "Is Sync Target" you'll find the "yes" flag.


Copy of Data


When you setup an Entity Sync, keep in mind that the target entity is physically created. And the data is only updated when the last successful sync was run - again based on the refresh frequency properties. And finally, if you remove the Entity Sync process, the Entity initially created still exists.

Domain Controlled Attributes need not apply

If your source entity has any attributes that are driven by a domain (table) in the model, that attribute will not be included in the sync.  No values are transferred over to the target. So, if you are trying to create a sophisticated model, using domains to manage your entity, this feature comes up a bit short. A nice start, but still incomplete. Still, if you can limit your master entities to only those that do not rely on another domain, this is a great addition.


Friday, December 18, 2015

MDS 2016 - Attribute Group Maintenance

An initial comparison between Master Data Services 2014 vs. 2016

As part of MDS System Administration, getting to Attribute Group Maintenance section still follows a similar path. Using the Manage menu item, select Attribute Groups. Also see MDS - Attribute Groups for User Access Control.


With MDS 2016, the Attribute Group Maintenance page has a richer form presentation. Like MDS 2014, the groups are listed on the left. But now as part of the description, is a list of all the attributes for each group. Gone are the expanding trees. The down side is that with the new format, you can only view one member type at a time. 

Attribute Group Maintenance - MDS 2016


Attribute Group Maintenance - MDS 2014

Add/Edit/Delete Attribute Groups


Adding a new group is as simple as clicking on the Add button.  A form opens up on the far right, with a field for the name, and three sets of pick boxes for the attributes, the users and groups. Feature wise, this is the same as MDS 2014, but with a lot nicer interface, and a much snapper one as well.

Add a new Attribute Group - MDS 2016


Editing an existing Attribute Group follows the same approach. the only difference being that the Assigned boxes hold the current values.
  
And deleting a group provides a pop-up message when you press the Delete button.  Unfortunately, it does not tell you which Attribute Group will be deleted.

Delete warning - Attribute Groups - MDS 2016


Overall, it is a great enhancement.  The web forms are much faster, and the new pages present data with out having to expand a tree or drill into another form.

MDS 2016 User Interface receives a long overdue upgrade

As Microsoft progresses with SQL Server 2016 CTP updates, Master Data Services has been getting a long overdue face lift to the user interface.  And not just cosmetic changes.  Usability changes that make managing Entities and attributes much more intuitive. 

Main Page - MDS 2016

Main Page - MDS 2016

MDS - System Administration

Perhaps one of the biggest issues with Master Data Services (MDS) has been the user interface for System Administration.  Navigate to the Entity Maintenance section of MDS, and you are greeted with a sparse screen, with two simple buttons, without any text.  Highlight an entity, and you are presented with a few more cryptic buttons.  Intuitive it was not.

Compare that to the same section in SQL Server 2016 CTP 3.2.  Not only are you presented with the list of entities, but also a full listing of the meta data for each of the entities. No need to drill into the entity to discover its details.

Manage Entities - Main Page

Manage Entities in SQL Server 2016 - MDS

Manage Entities in SQL Server 2014 - MDS

Editing Entities 

MDS 2016 lets you easily add or edit entities directly on the main Manage Entities page.

Edit Entities in SQL Server 2016 - MDS
Unlike MDS 2014 and earlier versions, where you had to drill down into a new page. Made painful by the generally slow response time.

Edit Entities in SQL Server 2014 - MDS

Adding or editing attributes

Adding or editing attributes is another area that has vastly improved. Simply highlight an entity on the main Manage Entities page, and click on the Attributes button. This opens up a new, and flexible tool to manage an entity's attributes.  At the top are drop-down combo boxes to change to a different entity, or even a different model. At least in theory.  In our CTP3.2 version, making a change to drop-down boxes in the Manage Attributes page did not have an effect.  But, the layout is clear, so it can only be a matter of time before they get this working. And they have it working on other pages. We can only hope.

Manage Attributes in SQL Server 2016 - MDS

Edit Attributes in SQL Server 2016 - MDS

Edit Attributes in SQL Server 2014 - MDS

If Microsoft continues with the MDS enhancements, MDS just might start to make some headway in the master data management world.

Looking for an overview of the mechanics of Master Data Services.  Check out this posting on Simple-Talk: Master Data Services – The Basics


Master Data Services 2016 - Still requires Silverlight

If you have started to use the new Microsoft browser Edge in Windows 10, and you are using Master Data Services, you quickly find out that Edge does not support Silverlight. According to an official Microsoft blog Moving to HTML5 Premium Media, Edge development intentionally omitted ActiveX and thus Silverlight.

For SQL Server 2016 CTP 3.2, MDS continues to require Silverlight.

Wednesday, December 16, 2015

Query Store: Resource List - SQL Server 2016

SQL Server 2016 is coming out with Query Store, effectively a tool to monitor query plans over time, and to revert back to an earlier plan when the performance gets tough.

If you are interested in the Query Store, you may be familiar with some of the existing query optimization tools. Many of us worked with the Basket of Performance Queries, by Ian Stirk for SQL Server 2005. We picked up other SQL tools to check for the top CPU consumers, procedure cache queries, learned more about the execution plan and many others.

Rather than post another write-up of the new Query Store, I've listed out some of the Query Store resources that have already been posted. Plus, for those still working with older systems, the second section lists out many of the existing tools already available. If you know of any that should be included, please send the link my way for inclusion.

Query Store Resources


MSDN: Monitoring Performance By Using the Query Store
MSDN: Using the Query Store with In-Memory OLTP (a must read)
MSDN: Best Practice with the Query Store
Redmond Magazine: SQL Server 2016 Preview
Benjamin Nevarez: The SQL Server Query Store
Brent Ozar: (fm: Nov 2014) SQL Server Query Store
Eric Darling: The case for Query Store in tempdb
sp_Blitz Result: Query Store Disabled

Other Optimization Resources


Ian Stirk: Performance articles on SQL Server Central
Ian Stirk: Basket of Performance Queries - SQL 2005
Brent Ozar: sp_BlitzCache,  Cache analysis script
Picasso Database Query Optimizer Visualizer
Brent Ozar: the Art of the Execution Plan
Opsserver @ GitHub, Stack Exchange's Monitoring System
SQLSentry: PlanExplorer (free and Pro)

Tuesday, December 15, 2015

MDS - Attribute Groups for User Access Control

Master Data Services (MDS) has a feature called Attribute Groups, which is actually a good name for the feature. As we will discover, security and controlling user access is a good use for Attribute Groups.

Typically, our first exposure to Attribute Groups occurs in the Explorer feature viewing data. Using the feature in MDS Explorer, it allows us to quickly filter down to related columns in what could be a wide entity. With the MDS Product data sample, we see five Attribute Groups, plus the [All Attributes] list. In our example, I added a new group "AnotherAttrGrp."


Groups and User Access

So basically, the Attribute Group feature creates column oriented filters. Nice, but security might be a more compelling reason to consider using Attribute Groups. As part of the System Administration section, we can group selected attributes into one or more Attribute Groups, and then control which users and [user] groups have access to these attributes. Once you have an entity created, along with some, or all of the attributes, you can create groups. 

What is a Leaf Group?

In MDS, attributes are divided into three different types:  Leaf, Consolidated, Collection.  For our discussion, we'll stick with Leaf Attributes.  Leaf Attributes are basically the typical, standard attributes found in most Entities.


Add a New Leaf Group

Under the Manage menu, select Attribute Groups.  Next select/highlight Leaf Groups, and then select the Add Attribute button (the green Plus button in SQL 2014). Then Add your new Group Name.

Edit Leaf Groups


For your newly created Leaf Group, or an existing group, expand the group and then select/highlight on Attributes item. Then select the Edit button (Pencil).


The next screen will display two pick boxes. The one on the left shows all the available attributes. The box on the right shows the current list of columns assigned (mapped) to this Attribute Group. Adjust the columns and save.


Security, Users and Groups

In MDS, individual users and groups are managed separately. Adding Users and [User] Groups follows the same pattern we followed to assign attributes. Select/highlight either the Users or [User] Groups item, and click the edit button (pencil)


Again, you will have two pick boxes. On the left are the available users or [user] groups, while on the right are the currently assigned users or [user] groups. Adjust and then save. That's it.  


MDS: Deprecated - Explicit Hierarchies in SQL Server 2016

Explicit Hierarchies in Microsoft's Master Data Services was always a curious feature.  Yes, it enabled you to create a hand crafted hierarchy, but why? For example, in the sample model for Product, the Product entity (table) has a product category and subcategory hierarchy based on two entities (tables). A table, or in the case of MDS, an entity, is a more data architect friendly way to organize. I'm sure there were some benefits to hand-crafting an explicit hierarchy, but I have found that table based structures are the preferred approach. 

Starting with SQL Server 2016, the Microsoft Master Data Services Blog has posted that explicit hierarchies and collections have been deprecated.  It seems they have enhanced Derived hierarchies to the level where Explicit hierarchies are no longer needed. See:  Deprecated: Explicit Hierarchies and Collections.

Monday, December 14, 2015

Data Linage - Credibility for ETL History

Lack of credibility is perhaps the biggest problem with data warehouses. So now I'm noticing some tools to help people trace data in a data warehouse back to the source. Where it came from, how it was changed, etc.  - all this is after-the-fact. Perhaps valuable, but a well designed ETL process already includes this type of information. A result from the premise that the data in a data warehouse is 100% accurate. It rarely has been, but it should be close.

Big data, Hadoop, web searches, and much of the on-going world of statistics are approximations. Best guesses  -  that can change once you make an adjustment to the incoming data or the rules used for the query.

Friday, December 11, 2015

Data Lake? More like the Data Junk Closet

Data Lake is the hottest term being pushed by consultant companies. But what is it?  In summary, it is a place where you store all the incoming data, in what ever form it might be in. For a tool like Hadoop, which was based on published Google papers, the overall intent was to capture data as quickly as possible, in its original form. Once loaded, you start to make sense of it, and effectively, provide structure. Makes sense then to use Hadoop. Another key feature of Hadoop is redundancy. The default setup for Hadoop is to store the data on three different nodes. So for on-premise, Hadoop is a good place to store data, and then organize it.

But, a "Data Lake"?  Well, it's a diplomatic term, and sounds good for business presentations. But perhaps it's really more like a data junk closet. I've also seen the term "Data Swamp" used. The place were you put all kinds of stuff - and tell yourself that you'll organize it tomorrow. Perhaps.

So which is it...

.. a sound and wise approach to storing data, or just a dustbin for that which will not be used?  That all depends on the organization. Most likely, it will become both, with only discipline minimizing the chaos.

A real purpose

As organizations start to move towards fast data, the data lake will finally take on a true need and purpose. Sensor data, social media feeds, weather data, traffic data feeds, and the list goes on. If it applies to your business, your or your competitor will start to capture it, store it in a data lake, and start to analyze how it impacts your business.

You can find an excellent write up of the uses of a data lake here: http://www.dataversity.net/data-lakes-101-overview/.

Thursday, December 10, 2015

SSIS - Add row number to incoming source records

Credibility is critical to the success of a business intelligence / data warehouse project. Problems happen, and sometimes the problem is not the SSIS ETL process, but the incoming data. A business manager questions the validity of a number, and the BI team has to trace back to the source. And not just to the source file, but to the actual source record.

It's OK to tell someone you'll need to review the source file. It's better if you can tell someone that the data came from row # from file #, and then pull up the data quickly and easily. To do this, you need to know the actual source row number. SSIS makes this easy. 

Summary

When you are importing data from a file into your target database work table all you need to do is follow these simple steps.
  • Package variable:  
    • add a variable to capture the row count
  • In your Data Flow:
    • Add a Row Count task
    • Add a Script Task, with an output column
    • Add the new column to your destination export
This example was from a project done with SQL Server 2008, but applies to all the current versions.

The Details

Here is a more complete listing of the steps required in SSIS to add a row number to all of your incoming file records. When you are done, your data flow might look something like this:


Package Variable

As part of the package, create a user variable for the record count. For our example, we used User::RecordCntFile, Scope = Package, DataType = Int32, Value =0.  Naturally, if your maximum row count exceeds the capacity of the Int32 container, use Int64.


SSIS  Add the row number to incoming source records - Package Variable

Row Count Task

Create and then name the Row Count task. We named ours "Row Count."  Using the advanced editor for the Row Count task, make the following change.

  • Component Properties: 
    • In the Custom Properties section, assign your user variable to the custom property - VariableName.
  •  Input Columns:  
    • no adjustment or changes for this section are required.
  •  Input and Output Properties:  
    • no adjustment or changes for this section are required.


Assign user variable in the custom properties
  

Script Task


Add a script task to your data flow and give it a name. Using the Edit Script button, add the following code. The below code happens to be in Visual Basic, but could easily be in C#.

Script Code:
       

Public Class ScriptMain
   Inherits UserComponent
   Private _RowNumber As Integer = 1

   Public Overrides Sub Input0_ProcessInputRow(ByVal Row As Input0Buffer)
       Row.RowNumber = _RowNumber
         _RowNumber += 1
       End Sub

   End Class


  • Input columns:  
    • no adjustment or changes for this section are required.
  • Inputs and Outputs:  
    • Add a new output column, here named RowNumber, with a datatype of DT_I4 (four byte signed integer) to match our Int32 variable datatype.  If your variable is something other than Int32, change this as necessary.
  • Connection Manager:  
    • no adjustment or changes for this section are required.


New Output column:  RowNumber


Destination Task

The last step is to include the new column you added in your script task as part of the mappings in your destination task. With this, your data warehouse tables will contain the original source file row number.  And give you a big win the next time someone has to locate and validate the original source data.

Monday, December 7, 2015

Time of Day dimension

There are times when you need a time dimension. Web and operational data is a common use. Over the last month, what were the web statistics by hour of the day. What time of day do we get the most orders? Again, a time of day question.

So, we need a time of day dimension, along with some logic to capture the time of day. I've divided the creation and population of the time of day dimension into two parts. The first part creates and populates a simple five column time dimension. The later part provides several possible enhancements. Every data warehouse is different, so it makes it easier to first build out the core time of day dimension first, and then provides ways to extended it, so that you can extend it the way you need it.

Surrogate Key


While most dimensions are best served with a surrogate key, date and time dimensions are best when the key defines the value. Date and time dimensions never change, with no expectation of change. With absolutely no change, there is no need to use a surrogate key.  Our surrogate key is effectively an integer based compound key derived from the hour, the minute and the second. For example:

timeOfDayKey
fullTimeAltKey
hour
minute
second
0
000000
0
0
0
24639
024639
2
46
39
101324
101324
10
13
24


Data Dictionary

Column
Defintion
timeOfDayKey
Table key, and surrogate key
fullTimeAltKey
Character based time key, will all leading zeros
hour
24 hour clock hour in the day
minute
Minute for the hour
second
Second for the minute in the hour

Table Create


  /*  -----------------------------------------------------------
       create the initial table
    
         ----------------------------------------------------------- */
         SET ANSI_NULLS ON
         SET QUOTED_IDENTIFIER ON
         SET ANSI_PADDING ON
         GO
  
         CREATE TABLE [dbo].[dimTimeOfDay](
          timeOfDayKey int not null
         ,fullTimeAltKey char(6)
         ,hour tinyint
         ,minute tinyint
         ,second tinyint
          );
    
      alter table [dimTimeOfDay]
        add constraint PK_dimTimeOfDay PRIMARY KEY  ( timeOfDayKey);
   
      create index idx_dimTimeOfDay ON dbo.dimTimeOfDay (fullTimeAltKey)
        include ( hour, minute, second);


Initial Data Population


/*  -----------------------------------------------------------
        Populate the table
        # Rows:  86400
        ----------------------------------------------------------- */
       
  set nocount on
  declare @dtProcessDate datetime, @dtEndDate datetime, @intCounter int
         ,@intprocessDate int , @strFullTimeAltKey char(6),@intHour tinyint
         ,@intMinute tinyint, @intSecond tinyint
 
  set @dtprocessDate =  dateadd(dd, datediff(dd,0,getdate()),0); 
  set           @intCounter = 0
  select @dtEndDate = dateadd(dd,1,@dtProcessDate)
  select @dtprocessDate as 'process date', @dtEndDate as 'end date'
 
 while @dtProcessDate < @dtEndDate and @intCounter < 100000
   begin
   --print '------------------------------------------------------------'
   -- debug select @intCounter as 'Counter', @dtprocessDate as 'process date', @dtEndDate as 'end date'
 
   -- time parts, w/ explicit conversion from int to tinyint
 select  @intHour     = cast(datepart(hh, @dtProcessDate)  as tinyint)
         ,@intMinute       = cast(datepart(mi, @dtProcessDate)  as tinyint)
         ,@intSecond       = cast(datepart(ss, @dtProcessDate)  as tinyint)
 
  select @strFullTimeAltKey =  
            right( '00' + cast(@intHour   as varchar),2)
          + right( '00' + cast(@intMinute as varchar),2)
          + right( '00' + cast(@intSecond as varchar),2)
 
  select @intprocessDate = cast(@strFullTimeAltKey as int)
 
 -- populate table
 
  insert into dbo.dimTimeOfDay(timeOfDayKey,fullTimeAltKey,hour, minute, second )
  values ( @intprocessDate, @strFullTimeAltKey, @intHour, @intMinute, @intSecond )
   
  -- bump date
  select @dtProcessDate = dateadd(second,1,@dtProcessDate)
  select @intCounter = @intCounter + 1
 
  end


Possible Enhancements


For presentation purposes, we need something better than these five values. For this post, we have listed out six enhancements. Pick and choose as needed, or add your own.

Presentation Enhancements to the Data Dictionary


Column
Definition
TimeOfDayNameFullMil
00:00:00;  military format, time presentation, including seconds
TimeOfDayNameShtMil
00:00;  military format, time presentation, hour and minute only
TimeOfDayNameFullStd
12:00:00 am/pm;  standard format, time presentation, including seconds
TimeOfDayNameShtStd
12:00 am/pm;  standard format, time presentation, hour and minute only
HourNameStd
12 am/pm; hour only name
MinuteName
00:00 minute with seconds


Table Alter to add Enhancements


  alter table dimTimeOfDay
  add TimeOfDayNameFullMil char(8)
  
  alter table dimTimeOfDay
  add TimeOfDayNameShtMil char(5)
  
  alter table dimTimeOfDay
  add TimeOfDayNameFullStd char(11)
  
  alter table dimTimeOfDay
  add TimeOfDayNameShtStd char(8)
  
  alter table dimTimeOfDay
  add HourNameStd char(5)
  
  alter table dimTimeOfDay
  add MinuteName char(5)


Populate Enhanced columns


update dbo.dimTimeOfDay
set

 TimeOfDayNameFullMil = right('00' + cast(hour as varchar),2) + ':' + right('00'    + cast(minute as varchar),2) + ':' +right( '00' + cast(second as varchar),2)

,TimeOfDayNameShtMil = right('00' + cast(hour as varchar),2) + ':'
  + right('00' + cast(minute as varchar),2)                      

,TimeOfDayNameFullStd = case 
  when hour = 0 then '12' + ':' + right('00' + cast(minute as varchar),2) + ':' +right( '00' + cast(second as varchar),2)  + ' am' 
  when hour >= 1 and hour <=11 then cast(hour as varchar) + ':' + right('00' + cast(minute as varchar),2) + ':' +right( '00' + cast(second as     varchar),2)  +' am'
  when hour = 12 then '12' + ':' + right('00' + cast(minute as varchar),2) + ':' +right( '00' + cast(second as varchar),2)  + ' pm'
  when hour >= 13 then cast((hour-12)as varchar) + ':'          + right('00' + cast(minute as varchar),2) + ':' +right( '00' + cast(second as varchar),2)  + ' pm'
     else '?' end

,TimeOfDayNameShtStd = case 
 when hour = 0 then '12' + ':'  + right('00' + cast(minute as varchar),2)  + ' am'
 when hour >= 1 and hour <=11 then cast(hour as varchar) +  ':'  + right('00' + cast(minute as varchar),2) + ' am'
 when hour = 12 then '12' +  ':'          + right('00' + cast(minute as varchar),2)   + ' pm'
 when hour >= 13 then cast((hour-12)as varchar) + ':'  + right('00' + cast(minute as varchar),2) +  ' pm'
    else '?' end

,HourNameStd = case 
 when hour = 0 then '12 am'
 when hour >= 1 and hour <=11 then cast(hour as varchar) + ' am'
 when hour = 12 then '12 pm'
 when hour >= 13 then cast((hour-12)as varchar) + ' pm'
    else '?' end

,MinuteName = right('00' + cast(minute as varchar),2) + ':' +right( '00' + cast(second as varchar),2);


SSIS and Hadoop

Coming with the release of SQL Server 2016 are several new SSIS control flow and data flow components specifically for Hadoop.

Earlier Versions


But what if you need something now? Microsoft has a technical article for just this situation. Leveraging a Hadoop cluster from SQL Server Integration Services (SSIS) lists out sample scripts, and connection approaches such as WebHDFS, and SCOOP.

For Azure HDInsight, consider the Microsoft Hive ODBC Driver.

New for SQL Server 2016 SSIS


Control Flow:

  • Hadoop File System Task
  • Hadoop Hive Task
  • Hadoop Pig Task


Data Flow:

  • HDFS File Destination
  • HDFS File Source

Connection to Hadoop for the new SSIS task components uses either WebHCat or WebHDFS. Both of which will need to be setup by the Hadoop administrator. For Hortonworks you can find setup information here: